Your Clear Coat Is Thinner Than a Human Hair — Here's the Engineering Behind Paint Correction
Paint correction is often perceived as an art form—a subjective pursuit of shine. However, at its core, it is a precise mechanical engineering challenge. To truly restore a finish without compromising structural integrity, one must understand the microscopic terrain of the clear coat, the density of modern polymers, and the measurement of microns.
The Anatomy of Clear Coat
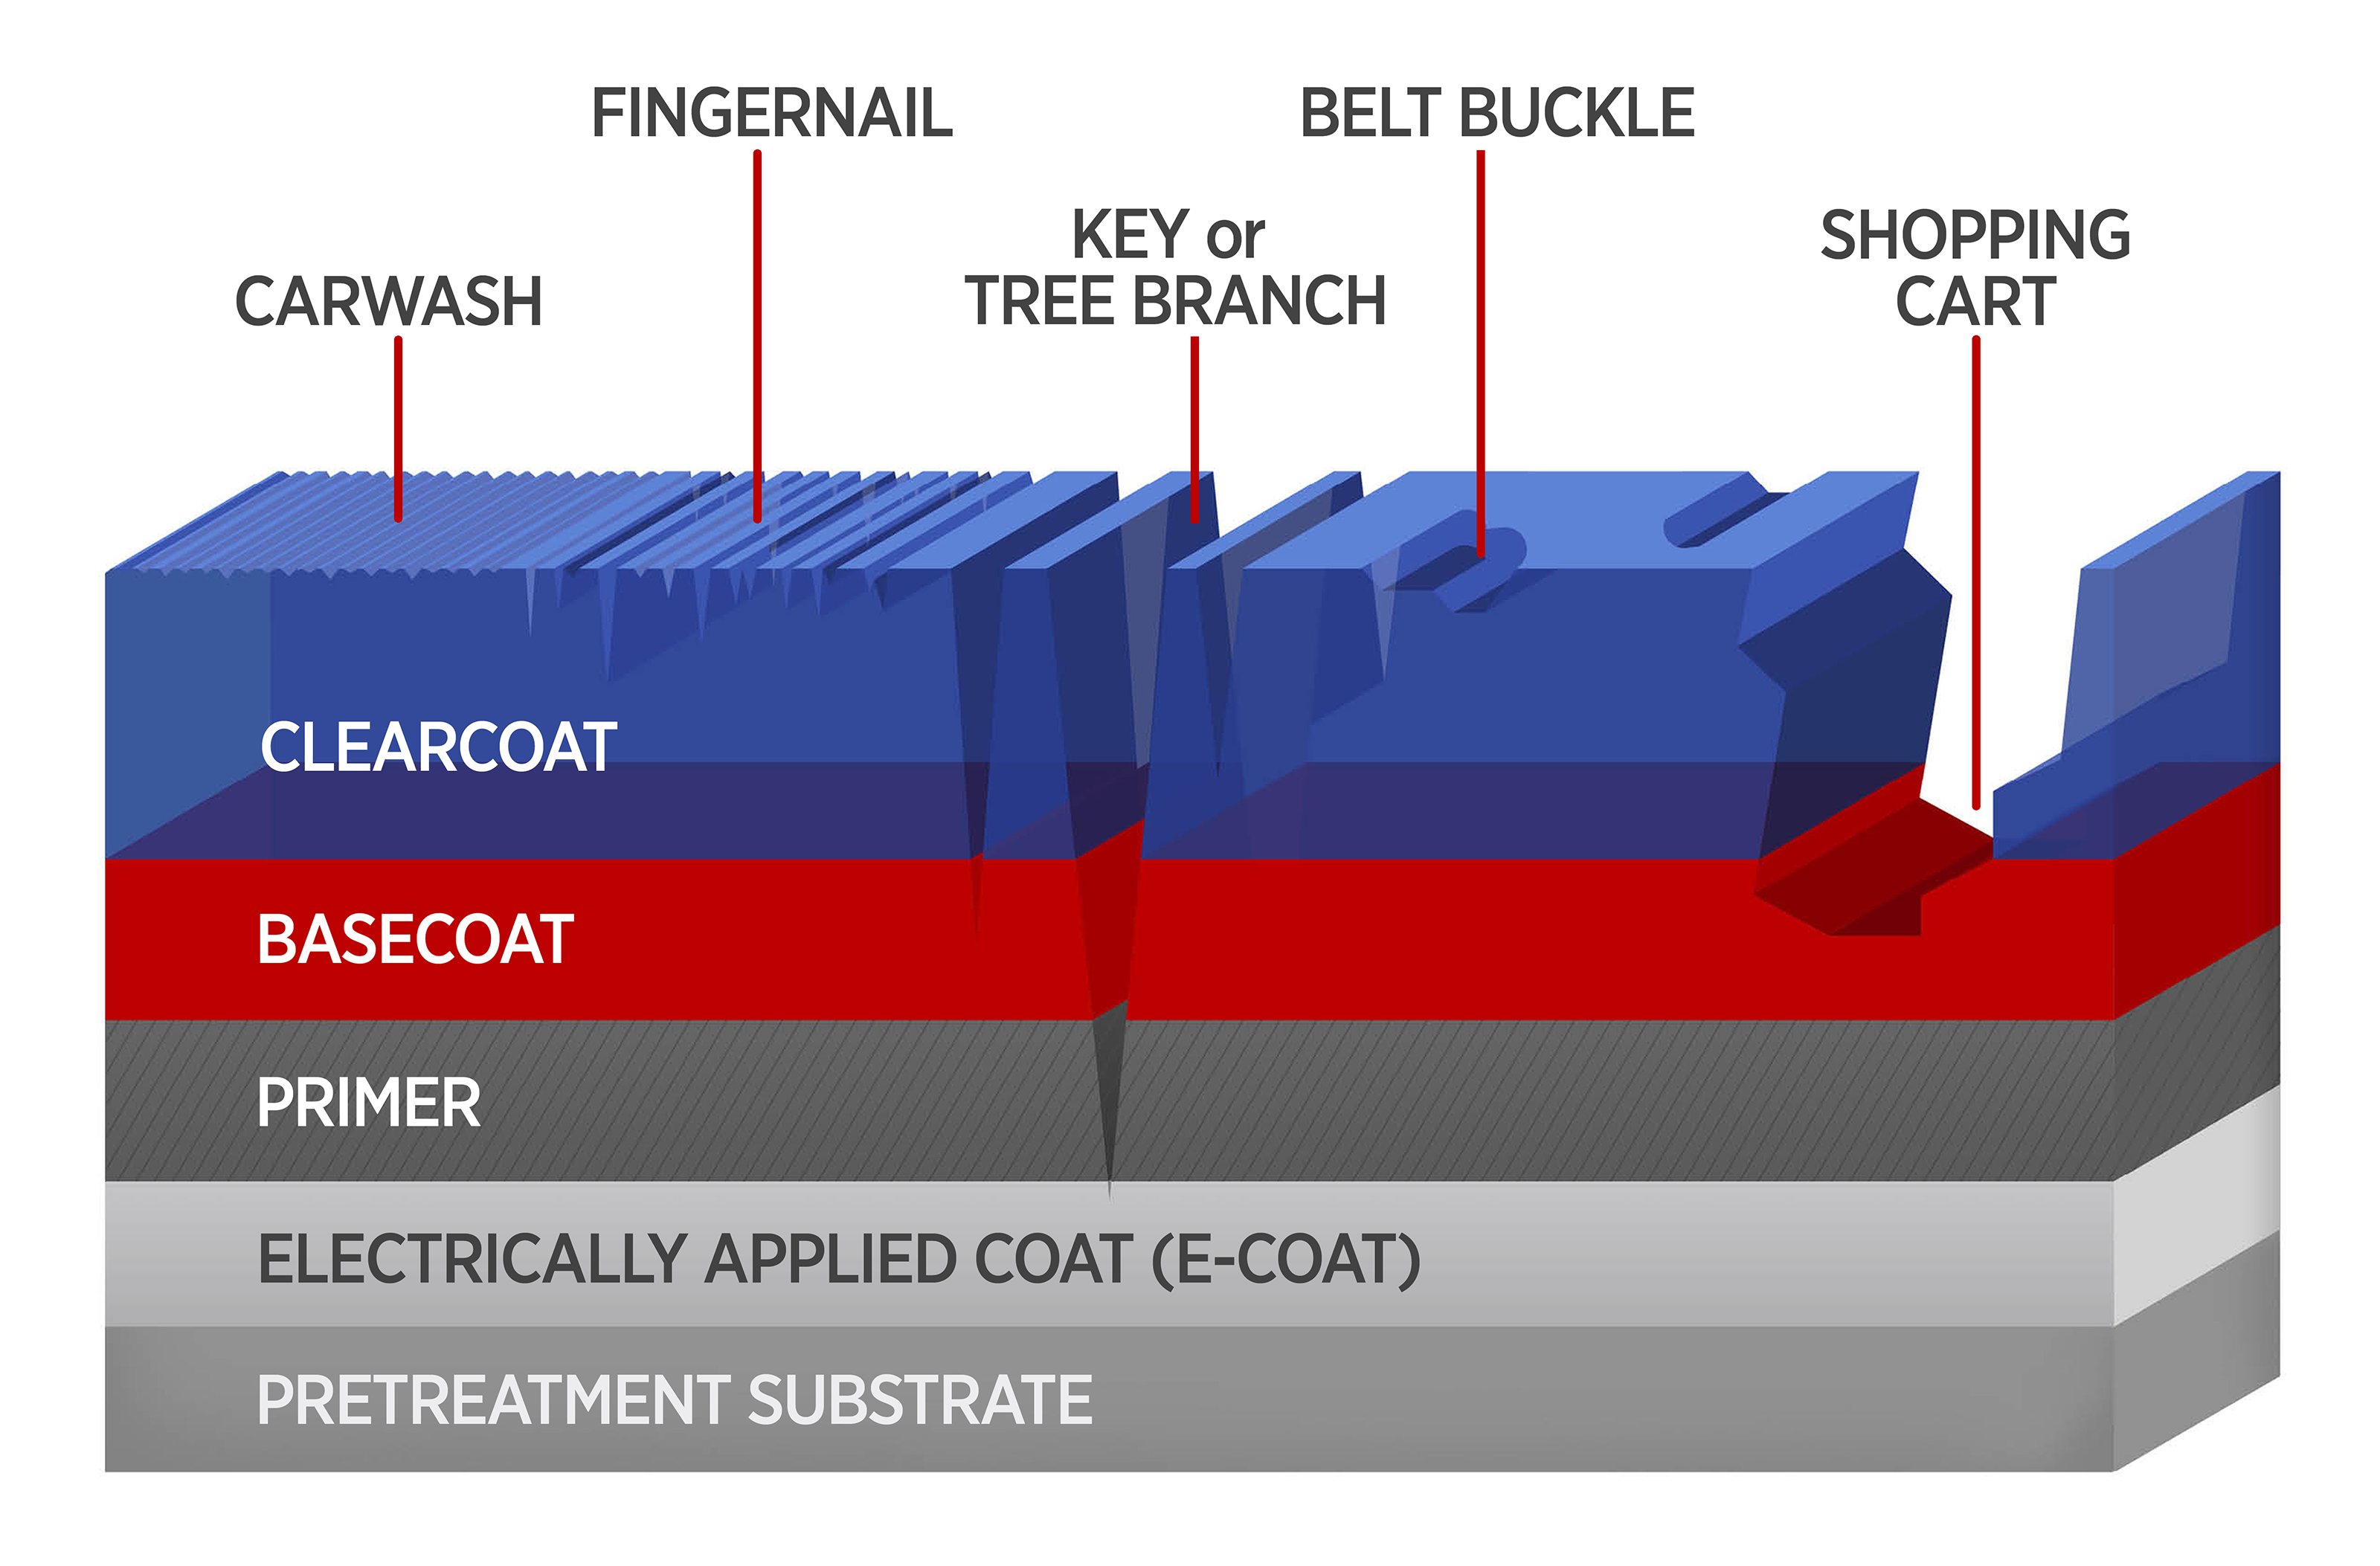
Modern automotive paint systems typically consist of three layers: the primer, the base coat (color), and the clear coat. The clear coat is your only defense against oxidation and UV damage, yet it is shockingly thin. On a factory-fresh vehicle, the clear coat usually measures between 35 to 50 microns. To put that in perspective, a human hair is roughly 70 microns thick.
PRO TIP: THE 25% RULE “Never remove more than 25% of the total clear coat thickness over the lifetime of the vehicle. Exceeding this threshold significantly increases the risk of clear coat failure (delamination) within 3-5 years of exposure.”
Microns Matter: Measuring Density
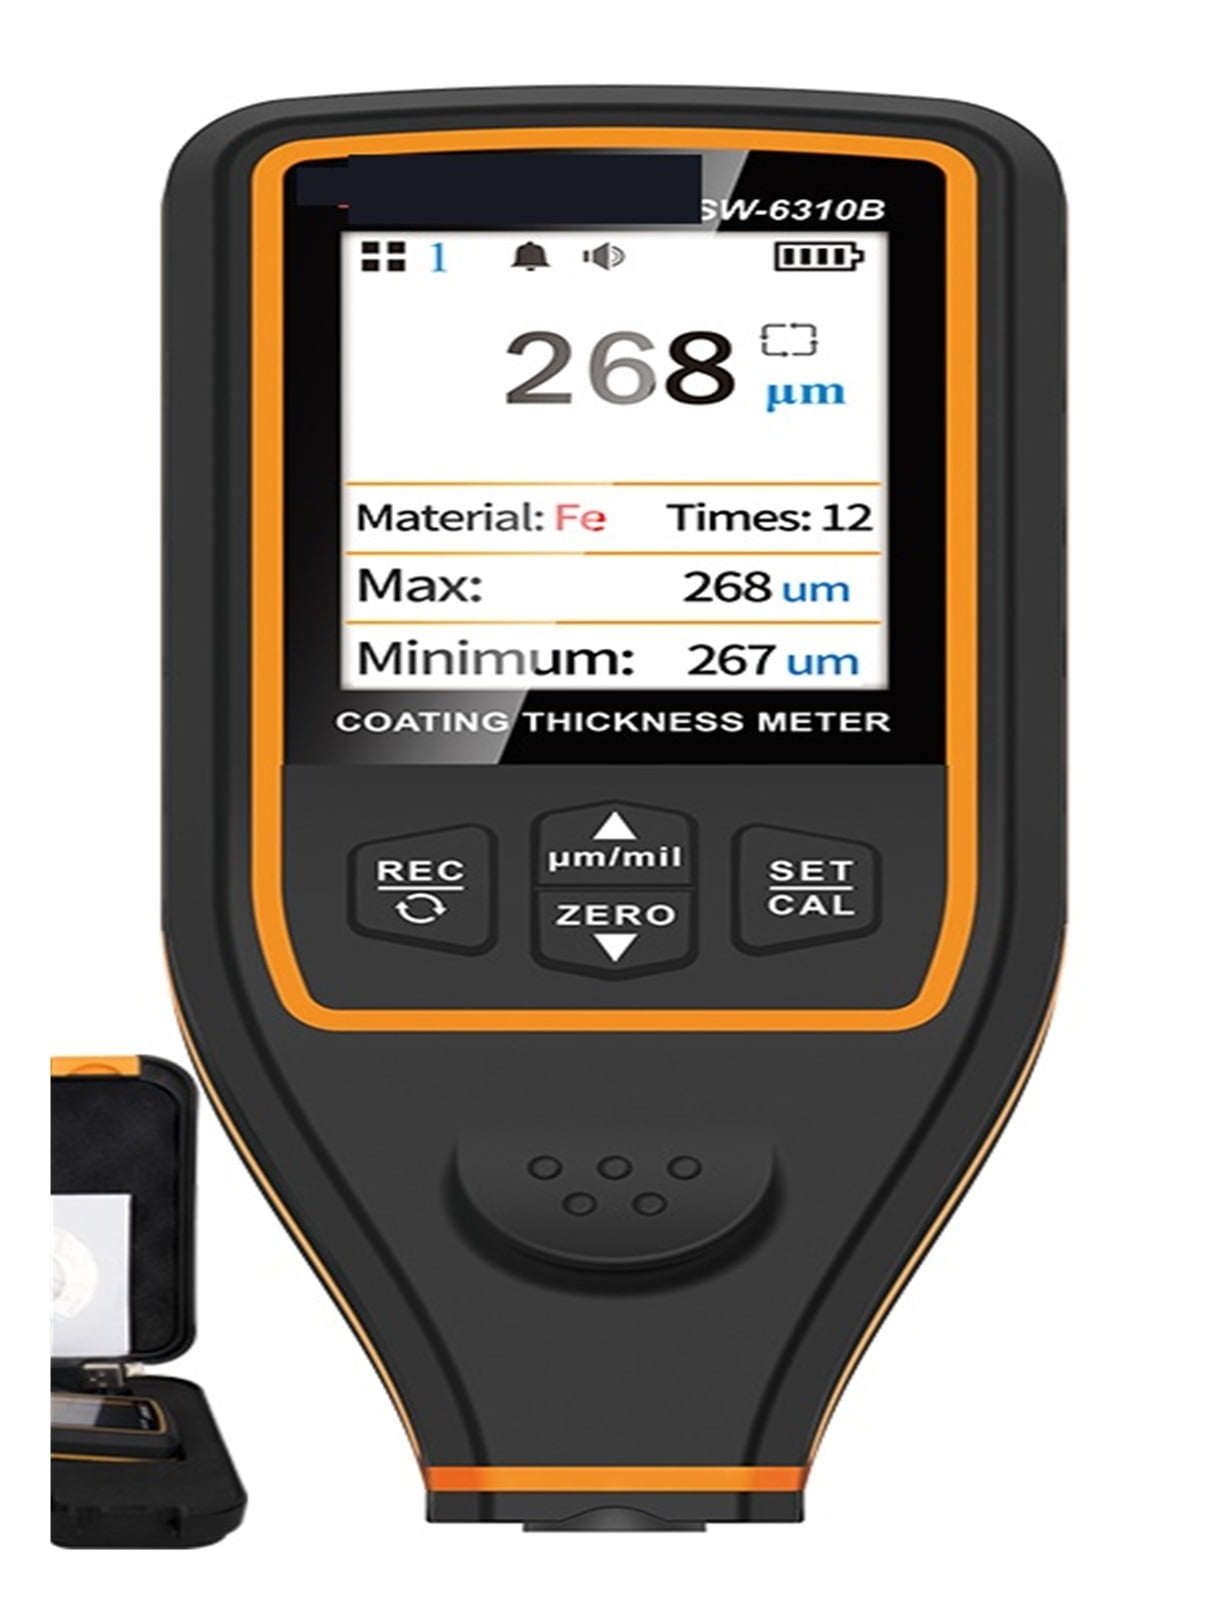
Before a single pad touches the surface, a full map of the vehicle’s paint depth must be recorded. Using an ultrasonic depth gauge, we measure multiple points on every panel. A variance of more than 10 microns between panels often suggests previous bodywork or aggressive localized correction.
Understanding Paint Density and Polymer Structure

Clear coat is not a uniform material. Modern clear coats are cross-linked acrylic, urethane, or ceramic-polymer blends. Their molecular density determines how they respond to abrasion. A softer polymer will cut faster but leave deeper scratches. A harder, ceramic-infused clear coat resists cutting but demands more aggressive compounds to correct—creating a paradox: the harder the coat, the more material you risk removing per pass.
Density is measured indirectly through hardness ratings—Shore D durometer readings or Vikers/Hardness (HV) scales. Factory coatings typically range from 2H to 4H pencil hardness. After-market ceramic coatings can push to 6H to 9H. Higher hardness means the surface resists scratches from daily use, but it also means less forgiveness during correction.
The Correction Process: Compound, Polish, Refine
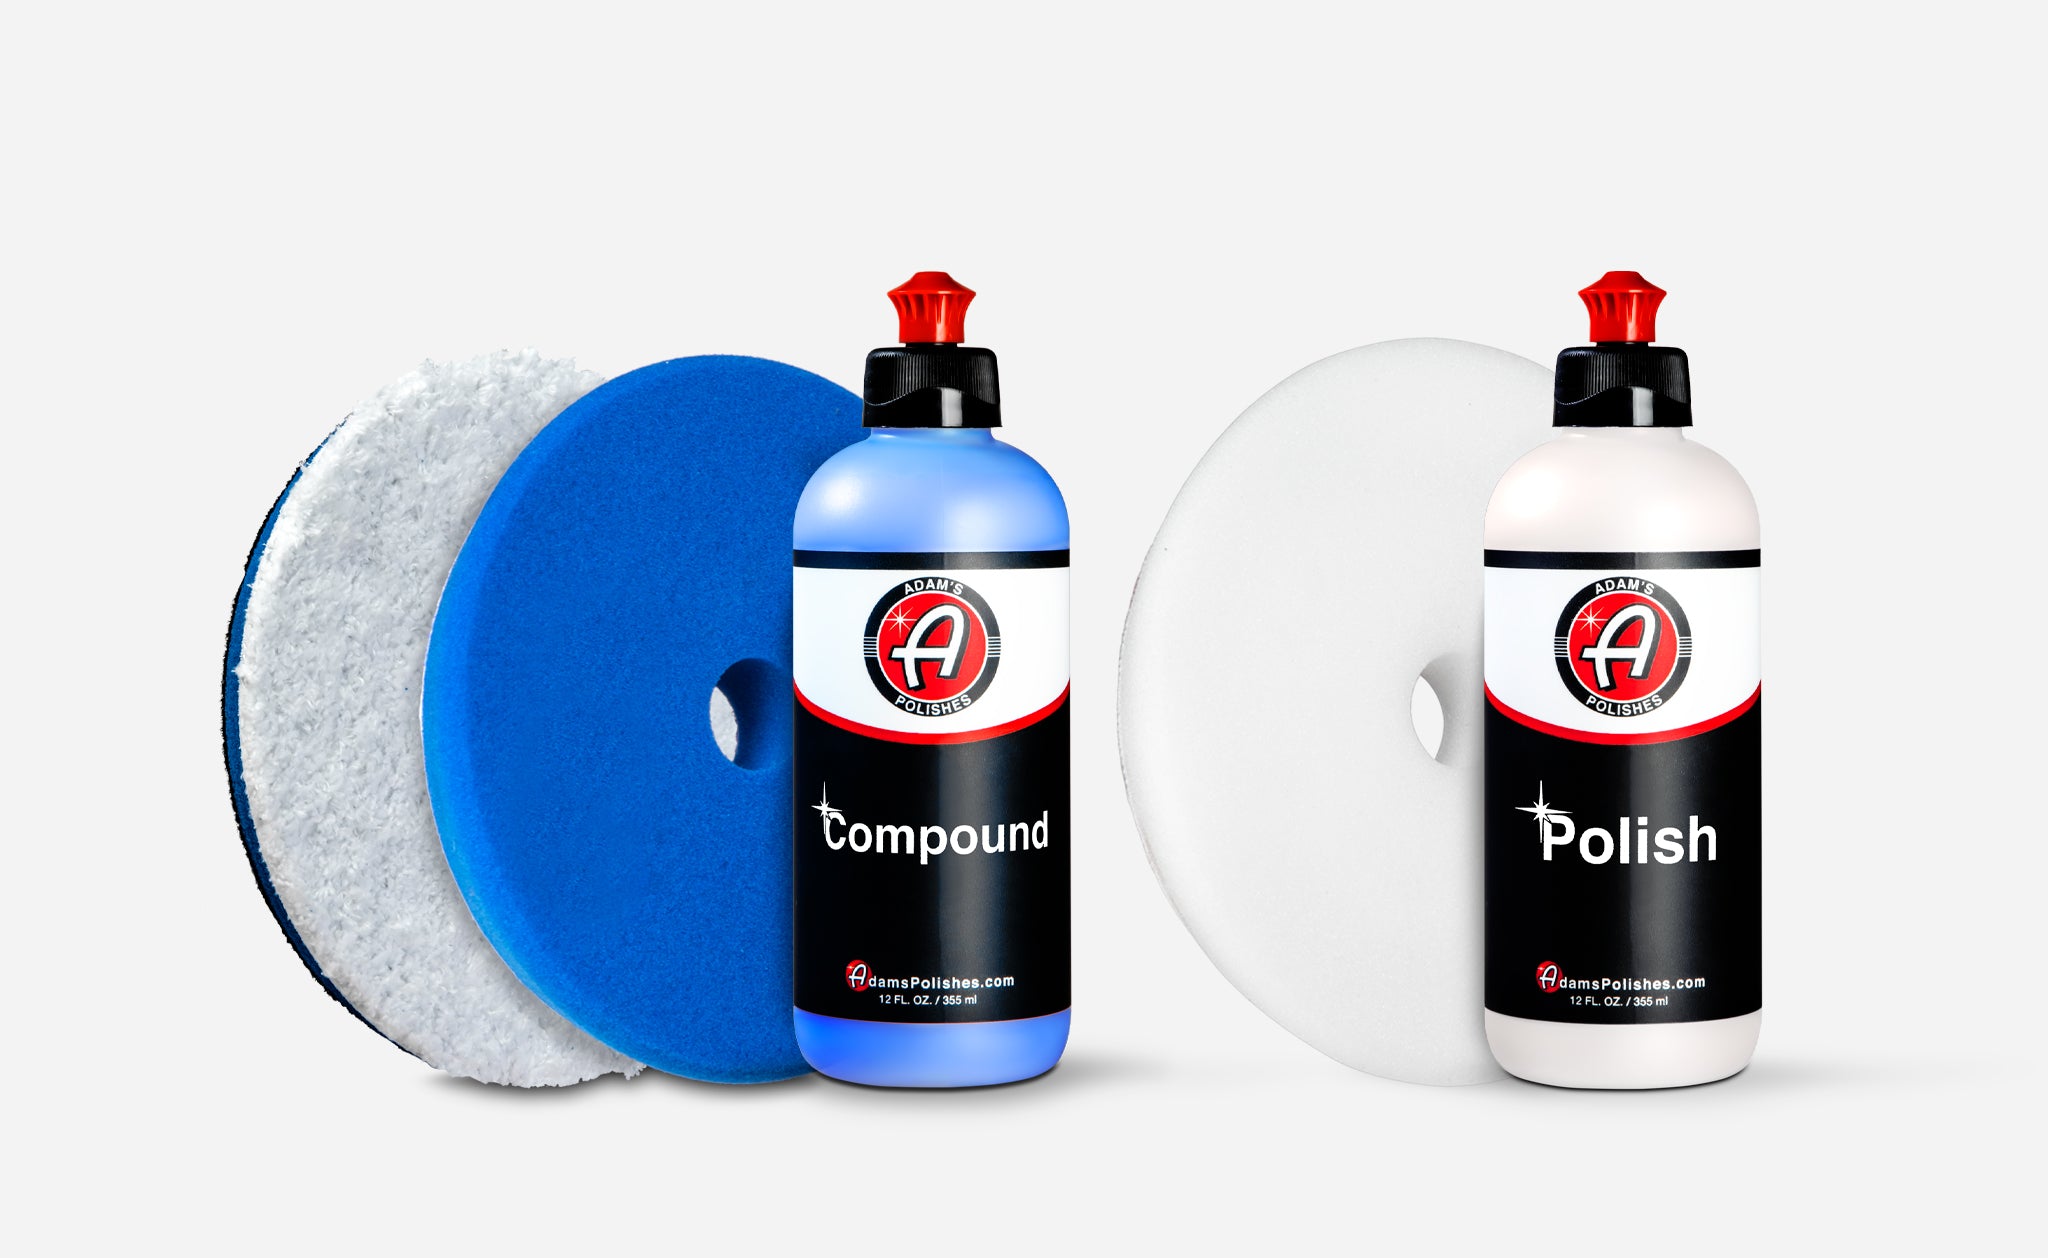
Paint correction follows a three-stage hierarchy:
Stage 1 — Compounding: Uses compounds with aggressive abrasive particles (typically aluminum oxide or diamond) suspended in a carrier compound. These are designed to rapidly remove oxidation, etching, and deep scratches. Compounds cut fast but leave a haze—micro-marring that requires subsequent stages to resolve.
Stage 2 — Polishing: Polishes use finer abrasives to cut through the haze left by compounding. They refine the surface to a uniform, high-gloss finish. The goal is clarity without depth loss.
Stage 3 — Refining: The final stage uses ultra-fine polishing oils or non-abrasive fillers to create a mirror-like reflection. Some detailers use wet sanding with 3000–5000 grit followed by a final IPA wipe.
The key principle: each stage removes less material than the last. This graduated approach respects the 25% rule by distributing removal across multiple passes rather than attacking with a single aggressive compound.
Pad Selection and Backing Plate Mechanics
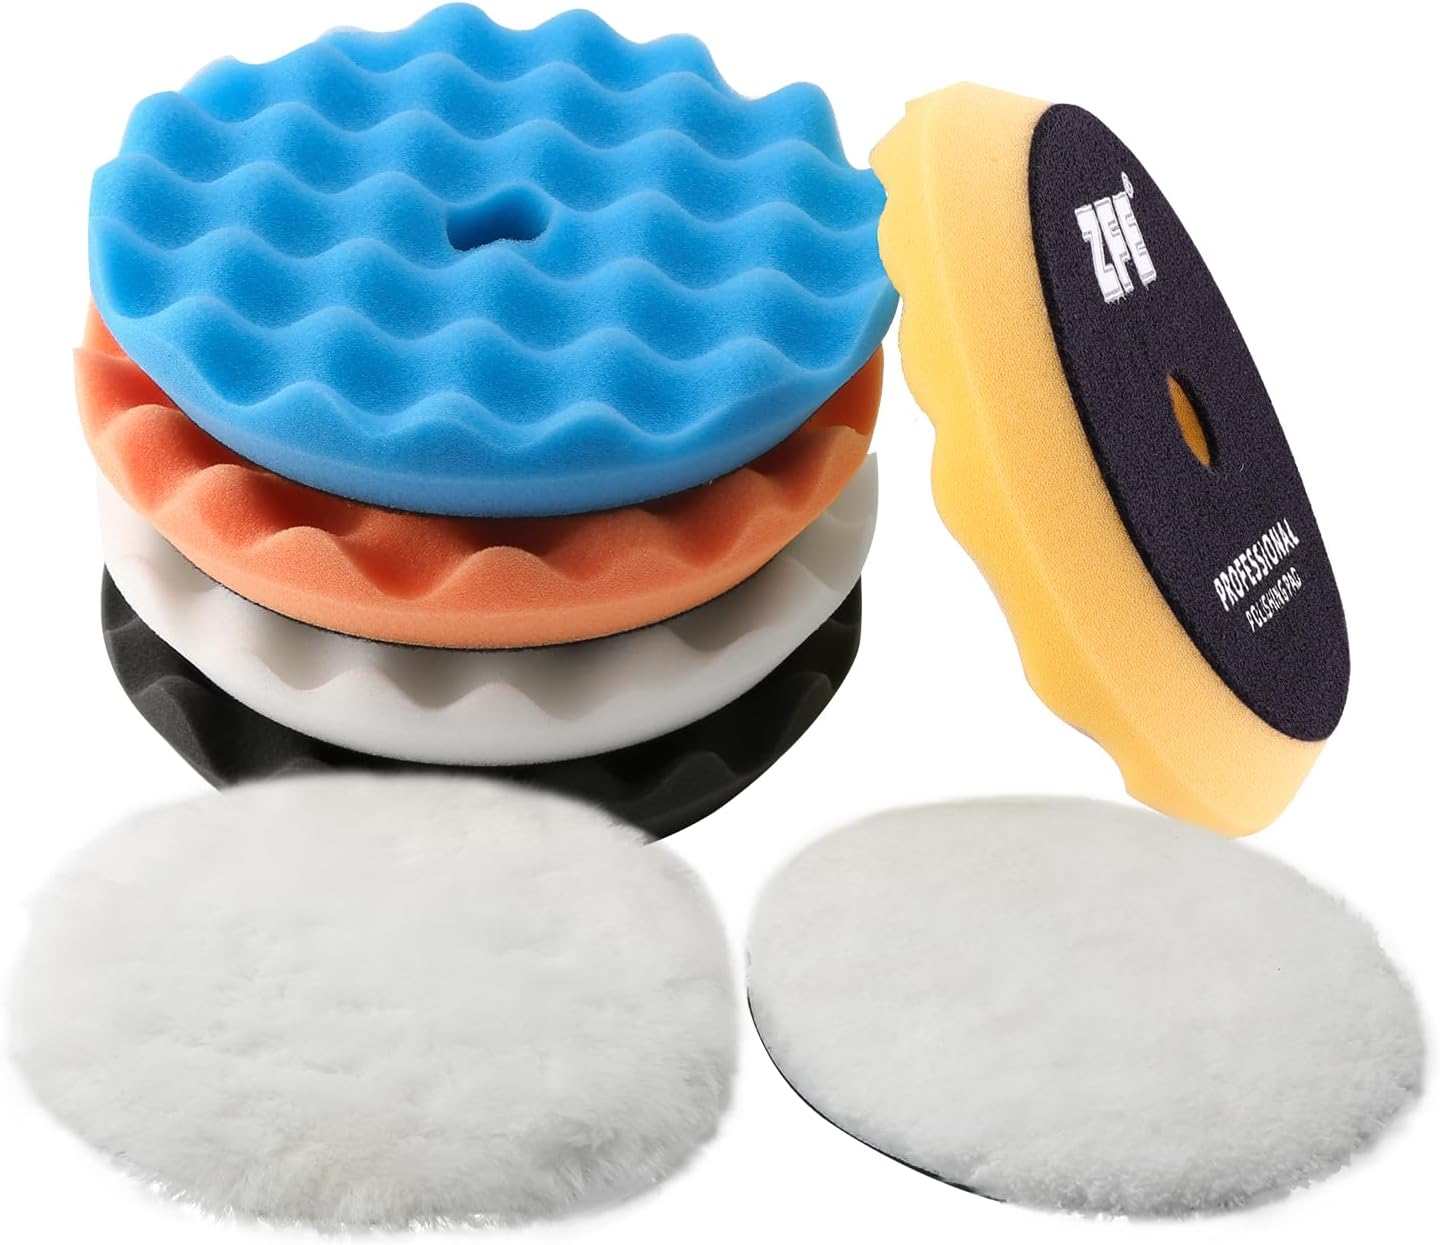
The pad is not a passive component—it is an active cutting surface. Foam pad chemistry has evolved dramatically:
- Wool/fleece pads: Aggressive cutting, high heat generation. Used for heavy oxidation and wet sanding prep. Risk of holograms if not properly broken in.
- Foam compounding pads (orange/blue): Medium-to-high cutting. The open-cell structure allows compound to flow and reload. Creates swirl risk if spun too fast.
- Foam polishing pads (white/yellow): Low cutting, high refinement. Open or closed cell determines finish quality.
- Microfiber finishing pads: Aggressive cutting with extremely fine finish. Used increasingly for ceramic coatings where traditional foam cannot achieve the required correction.
Backing plate selection governs heat management. A 3-inch backing plate allows access to tight radii and rocker panels where a 5-inch plate cannot reach. Backing plate hardness also matters—stiffer plates transmit more load (cut faster) but generate more heat; flexible plates conform to body curves but reduce effective pressure.
Pad pressure, RPM, and dwell time form the correction triangle. Increase one variable and you must decrease another to maintain safe temperature thresholds. Exceeding 140°F (60°C) on clear coat risks thermal softening and subsequent marring.
The 25% Rule in Practice
If your clear coat starts at 40 microns, you have approximately 10 microns of correctable material over the vehicle’s lifetime. This sounds like a lot—until you consider that a single pass with an aggressive compound and wool pad can remove 1–3 microns per pass. Three compounding sessions with heavy polish and you could be at the danger threshold.
This is why measurement before and after every correction session is not optional—it is the only way to track cumulative material removal. A digital paint depth gauge with 1-micron resolution (not the cheap 10-micron models) should be your primary tool before, during, and after every session.
When to Walk Away
There comes a point where paint correction is no longer the correct answer. If your paint depth reads below 20 microns on any panel, compounding is contraindicated—you are correcting against the primer. At this stage, options are:
- Paint protection film (PPF): Adds a physical barrier without requiring correction.
- Ceramic coating over low-clearance areas: Not ideal, but possible with adhesion promoters.
- Refinishing: Reshooting the clear coat is the only way to restore correctable depth.
Understanding the engineering does not make paint correction artistic—it makes it survivable. The goal is not a perfect finish today; it is a correctable finish for the next decade.
Tools Every Detailer Needs

A proper correction workflow relies on precision instruments:
- Ultrasonic paint depth gauge: 1-micron resolution, multiple measurement modes for steel/aluminum substrates.
- LED inspection light: 5000K to 6500K color temperature at low angle to reveal swirl and scratch patterns.
- Digital pyrometer: Contact or infrared temperature monitoring for pad and surface temperatures.
- Micrometer verification tool: Spot-check your paint gauge against known standards.
- pH-neutral panel cleaners: Pre-correction decontamination to remove industrial fallout and iron particles that mask true scratch depth.
Conclusion
Paint correction is engineering disguised as detailing. Every micron removed is permanent. Every degree of heat must be managed. Every pad selection is a trade-off between cut speed and surface quality. The detailers who understand this—who measure, record, and plan—will produce better results with less risk over the long term.
The art is not in the feel. It is in the numbers.